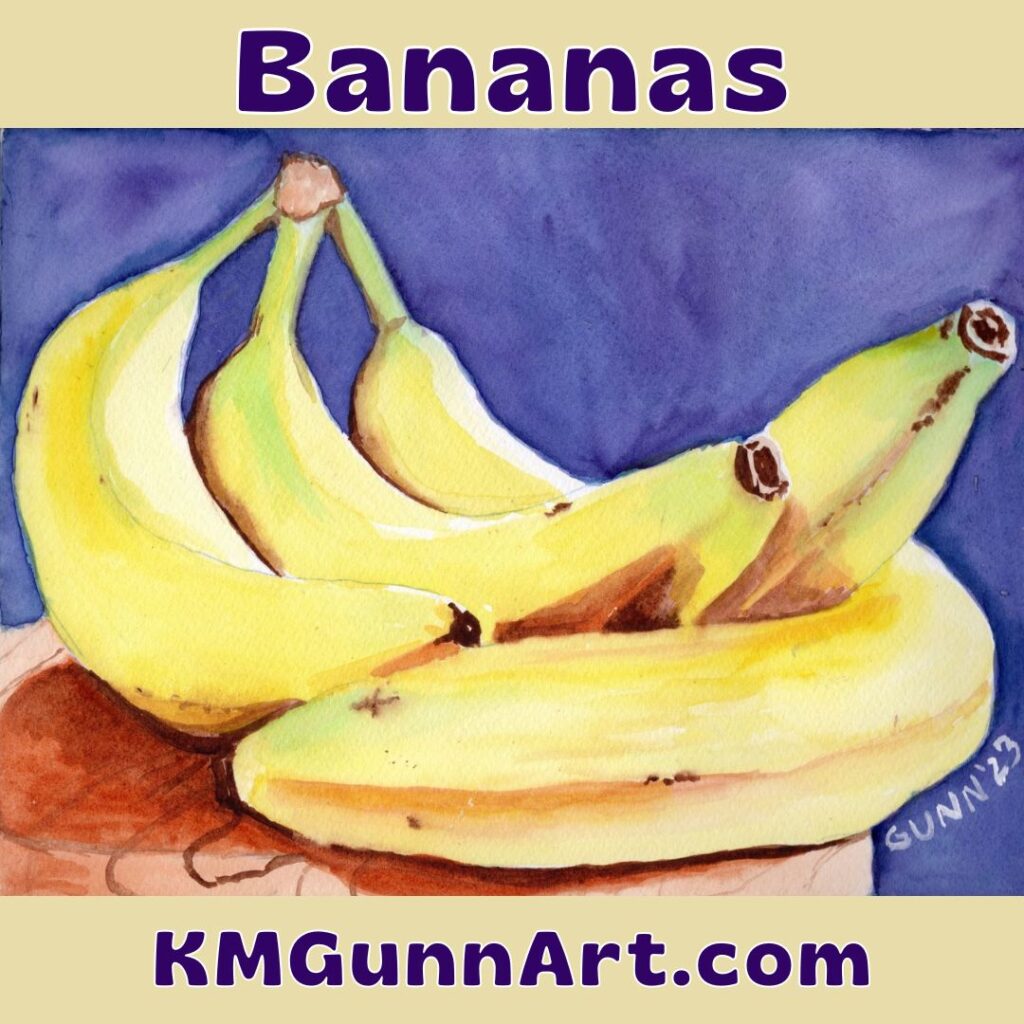
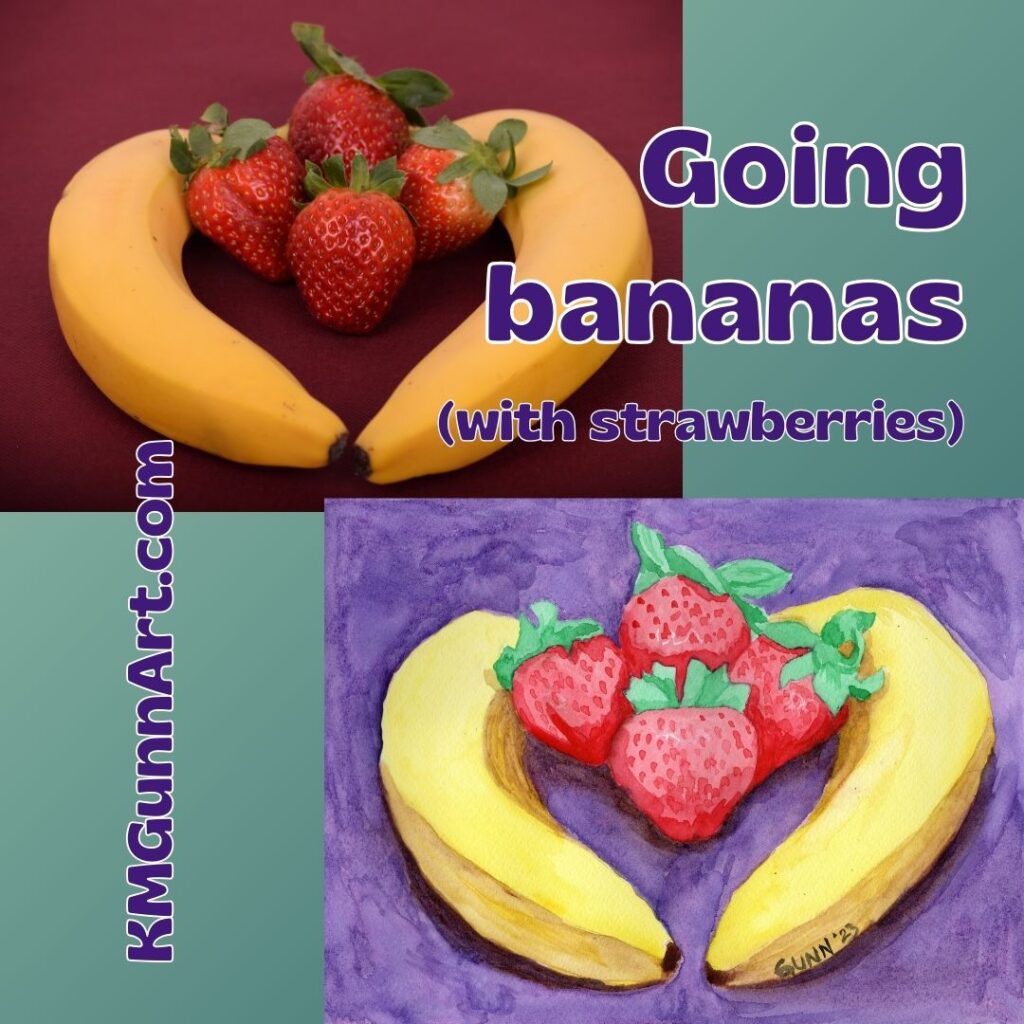
For the official final painting in my watercolor still life series I call the “going bananas” series, I decided to finally tackle some strawberries. It makes sense to my weird brain – I love that flavor combination, so why not draw and paint the two together? Famous last words, y’all ….
Choosing a reference photo and making changes to it
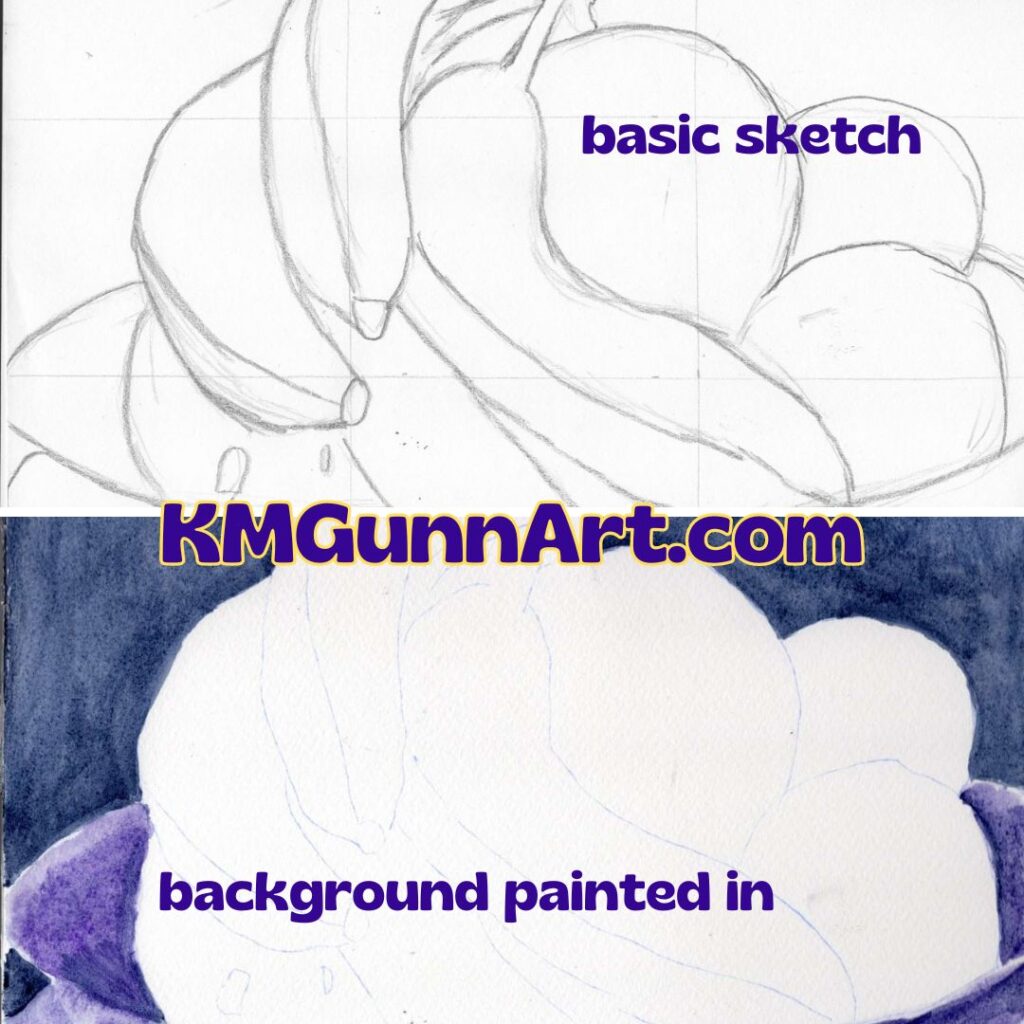
Choosing the reference photo was not difficult. I saw this one with the two bananas encircling four strawberries, and loved the layout and how the light and shadows played. What I simply did not like was that background color. Setting the fruit on any red was a bad idea (to my eye) as that overwhelmed the strawberries. So I took the color out of the reference photo and began working on the sketch.
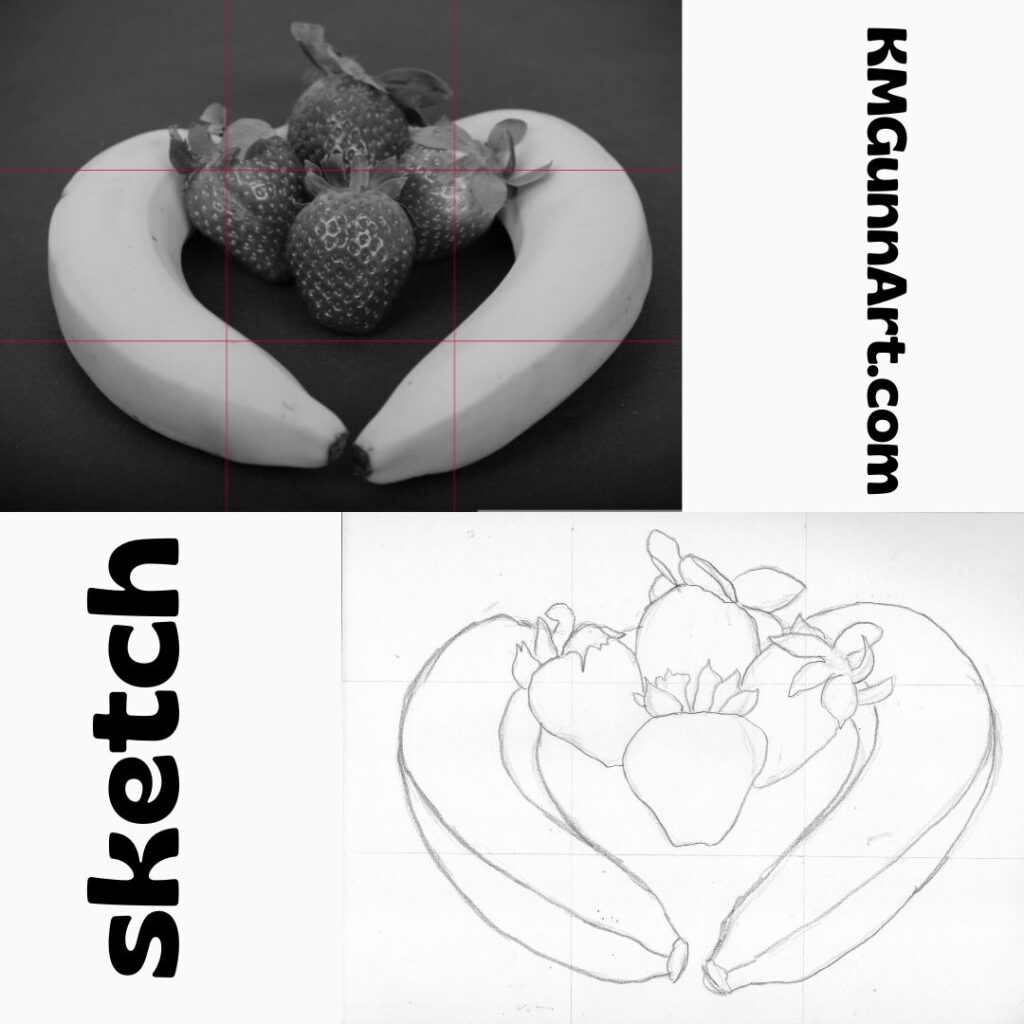
As y’all can see, I do use a 3 by 3 grid to do my sketches. This keeps me from starting in the center and then going off the right edge like I used to do all the time. That was a big weakness I had from as long as I could remember. I just can’t explain why I didn’t start using a grid sooner than I did. It was probably the same reason I didn’t start using transfer paper until this past year – the mistaken belief that I shouldn’t need it if I am a “real” artist. I guess there really is something magical about turning fifty, in that I can now laugh and say I don’t care what others think.
Coloring it in (with watercolor paint)
Once I had the basic lines transferred to my paper, it was time to play with color! The two bananas were no problem, especially since this was the third day in a row for painting the yellow fruit. I just kept using the same tubes of yellow. Seriously, why change it up when I was satisfied with what has been working?
I decided I wanted the background to be purple, but first I tried a lighter and redder shade called Cobalt Violet. Even after it dried, it looked too pale and far too pink. So, back to the dioxazine purple. Again, if it ain’t broke, don’t try to fix it.
For the strawberries, first I laid down a base layer of red. Then I went to work on all that green, trying to catch the shadows to make it look three dimensional. It was while I was working on the strawberries that my back started to really hurt. Since this was the finale of the series, and no one had dropped out of the art challenge yet, I had to get to some semblance of done. I gritted my teeth and painted on.
Links to purchase!
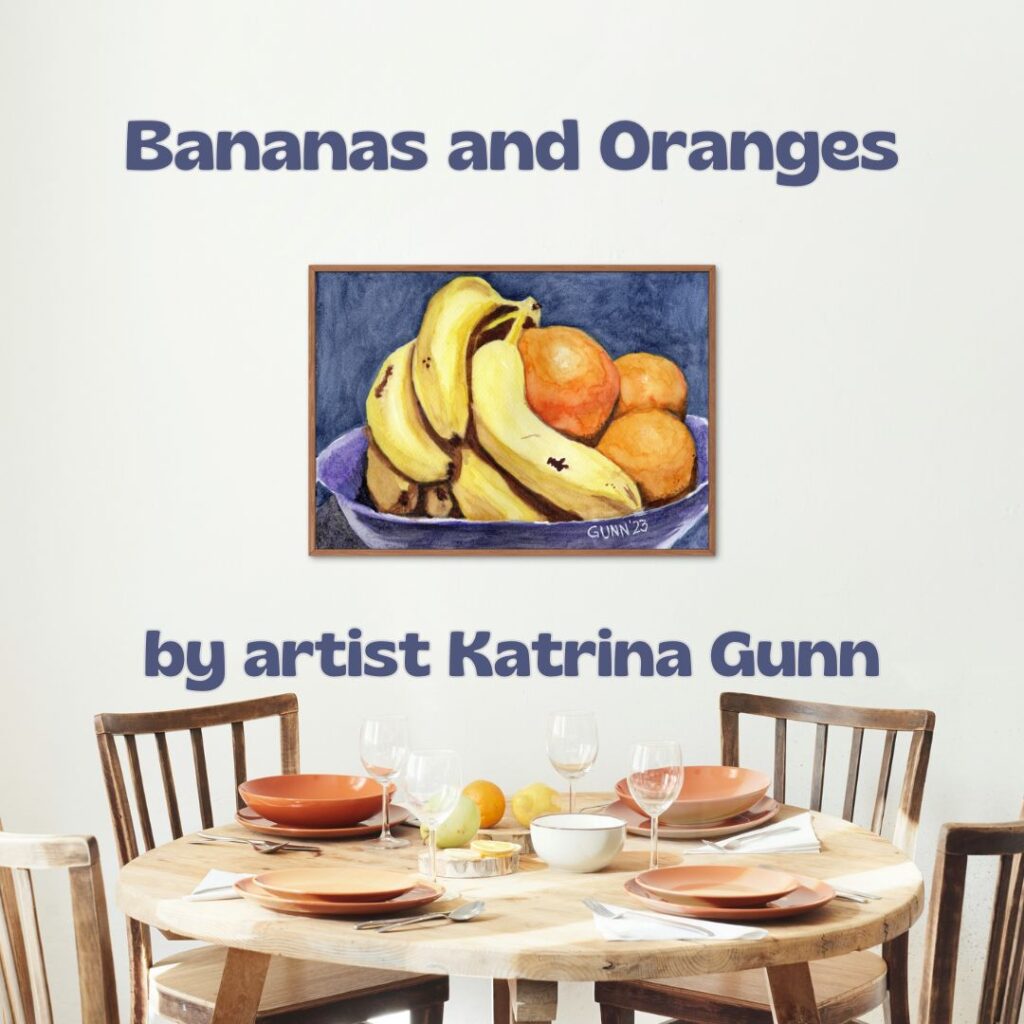
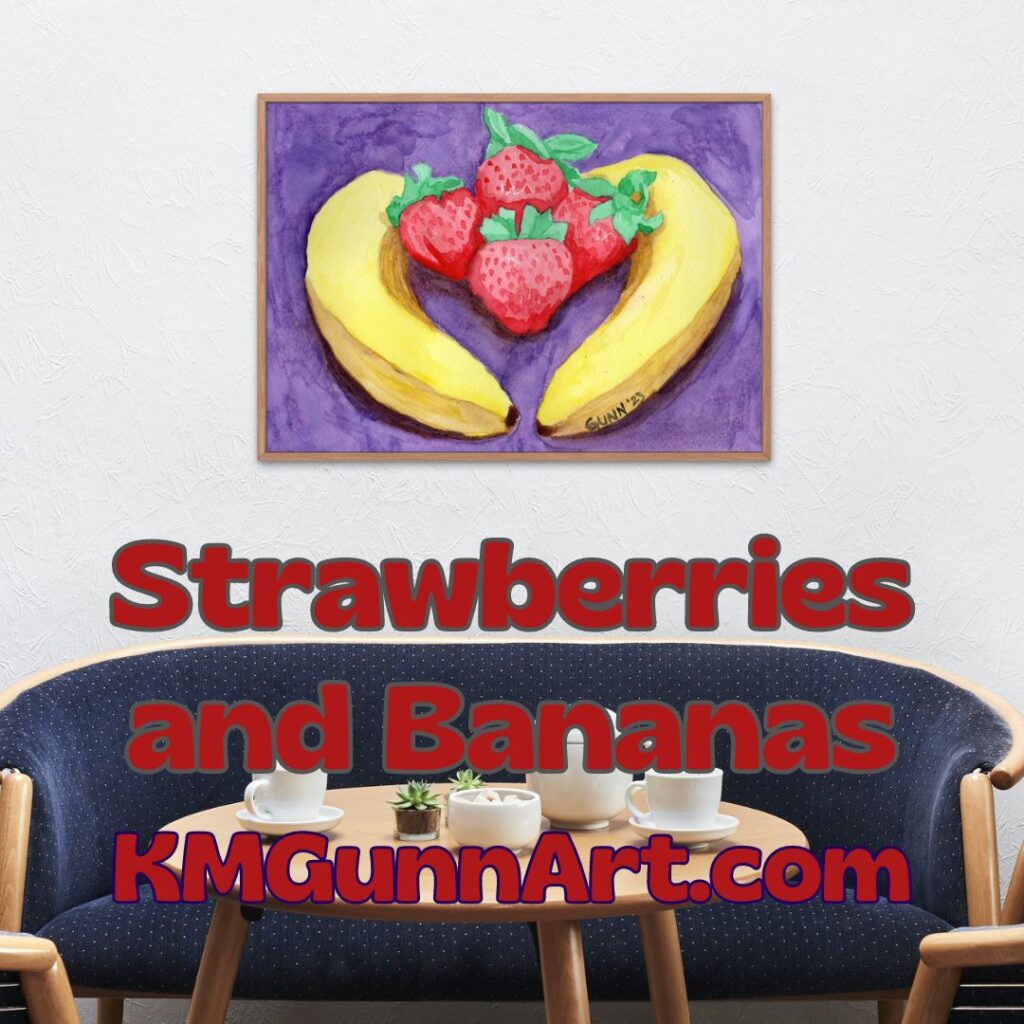
If you have the perfectly-sized blank spot on your wall to accommodate the 9 by 12 inch original watercolor painting, then head to my Daily PaintWorks gallery and purchase through them. Trust me, it will be easier than getting my attention when I am in the art zone. If you need a different size, you can order from as small as 6 by 8 inches up to as large as 45 by 60 inches through my Pixels shop. They also have some good swag, and I’ve heard they’ve improved their jigsaw puzzles.